How to photograph the night sky with your phone
Stars, meteors and auroras on a smartphone: how to use Night mode and Astrophotography mode, keep the phone steady, focus, shoot RAW and edit without noise.
LandGadget Newsroom · · 5 min read
On this page
- Pick a dark spot and check the Moon
- Keep the phone perfectly still
- Let night or astro mode do the work
- Use the main camera and don’t zoom
- Focus at infinity and lock exposure
- Use a timer instead of your finger
- Shoot RAW if your phone offers it
- Add a foreground for scale
- Protect your night vision and your battery
- Edit lightly
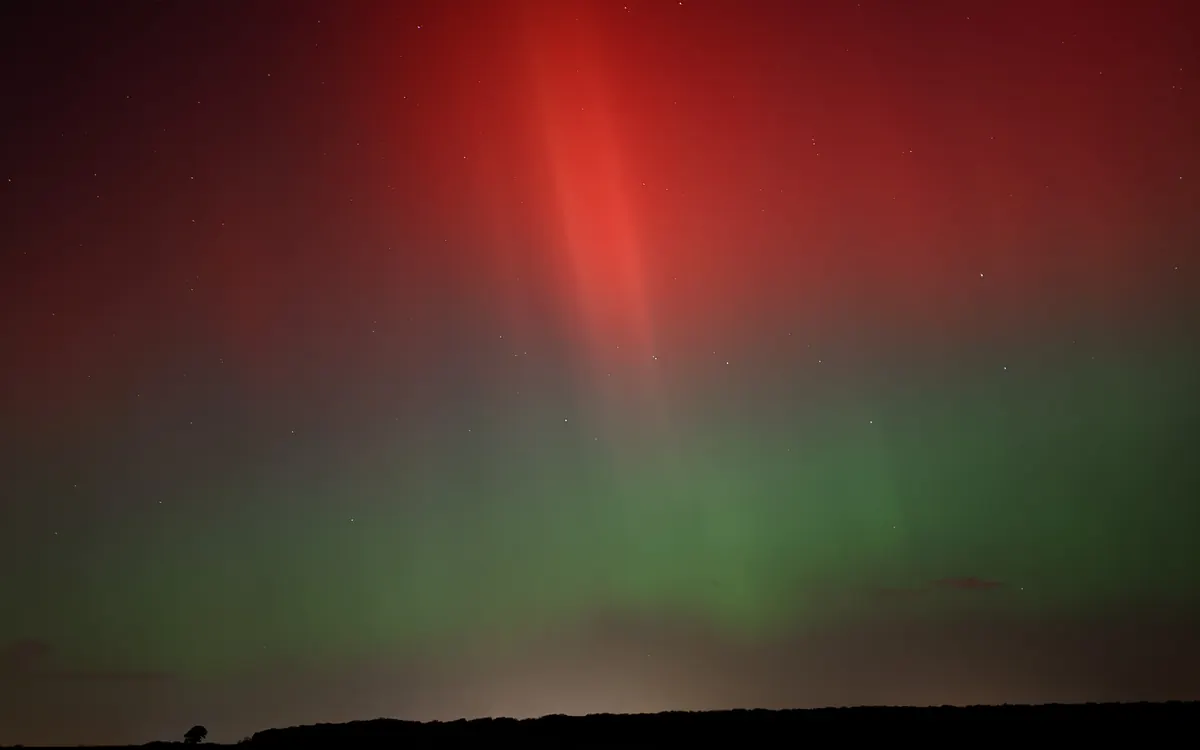
You don’t need a big camera to photograph stars any more. Modern phones stack many short exposures into one clean image, and with a little preparation they can capture star fields, bright meteors and even auroras. The cover photo above was taken on a Google Pixel 4a with an exposure of about 13 seconds, according to the file’s metadata. These are the steps that make the biggest difference.
Pick a dark spot and check the Moon
Light is the enemy. Street lights and a bright Moon wash out faint stars far more than any phone sensor limitation. Drive away from towns if you can (a light-pollution map helps), and plan around the lunar calendar: the nights around the new Moon are best, and on other nights wait until the Moon has set.
Keep the phone perfectly still
Night modes need long exposures, and long exposures need a steady phone. A small tripod with a phone clamp costs little and is the single best upgrade. In a pinch, prop the phone against a backpack or a rock. Phones detect stability and reward it. Google says Pixel’s Astrophotography mode can run for up to four minutes when the phone is on a tripod or another stable surface. Apple’s Night mode can extend to 30 seconds when an iPhone detects it is mounted and the scene is dark enough. Handheld, both use much shorter exposures.
Let night or astro mode do the work
Use the built-in mode before reaching for third-party apps:
- Google Pixel: open Night Sight. On a tripod in a dark place, Astrophotography switches on automatically and merges a series of roughly 16-second exposures.
- iPhone (iPhone 11 and later): Night mode turns on by itself in low light. Tap the Night mode icon and drag the slider to Max for the longest exposure.
- Samsung Galaxy: Samsung’s free Expert RAW app offers an Astrophoto mode on supported models.
- Other Android phones: look for Night or Pro (manual) mode, where you can set shutter speed and ISO yourself.
Use the main camera and don’t zoom
The main (1×) camera usually has the largest sensor and the brightest lens, so it gathers the most light. Ultra-wide and telephoto cameras are usually smaller and noisier in the dark, and digital zoom only enlarges the noise. Shoot wide and crop later if you need to.
Focus at infinity and lock exposure
Autofocus struggles with tiny points of light. Tap on the brightest star, a planet or a distant street light, then hold to lock focus and exposure (AE/AF lock on most phones). In Pro mode, set manual focus to infinity, then check a zoomed-in preview, because on some lenses “infinity” is slightly off.
Use a timer instead of your finger
Pressing the shutter shakes the phone. Set a 3- or 10-second self-timer, use wired earphones or a Bluetooth remote, or use a voice command. On a tripod this one habit removes most blur.
Shoot RAW if your phone offers it
RAW files (Apple ProRAW, Samsung Expert RAW, DNG on many Android phones) keep much more detail in the shadows and let you fix white balance afterwards without ruining the image. They are larger, so turn RAW off again for daytime shots if storage is tight.
Add a foreground for scale
A sky full of stars looks better with something on the ground: a tree line, a hill, a building or a person standing still. Put the horizon low in the frame, and try a few shots during blue hour, when the foreground still shows detail and the first stars appear.
Protect your night vision and your battery
Your eyes need roughly 20–30 minutes in the dark to adapt fully. Turn screen brightness down, use dark mode and use a red light rather than a white torch. Cold drains phone batteries fast, so keep the phone in an inside pocket between shots and bring a power bank. Our USB-C charger guide explains what fast charging your phone supports.
Edit lightly
Bring up exposure and shadows a little, cool the white balance to remove orange light pollution, and add a touch of contrast. Push noise reduction and sharpening too far and the stars turn into smudges. If you photographed a meteor, check the frames before and after it: phones often catch faint streaks you missed by eye.
What a phone can’t do: it won’t show galaxies, nebulae or planetary detail the way a telescope does. For that, see our guide to your first telescope. For what professional instruments can see, read about the James Webb telescope’s mystery emission in the Hubble Ultra Deep Field.
Frequently asked questions
Can a phone photograph the Milky Way?
Yes, under a genuinely dark sky with no Moon. Use a tripod, the main camera and the longest Night or Astrophotography mode exposure. From a city it usually won’t show.
Do I need a special astrophotography app?
Usually not. The built-in Night Sight, iPhone Night mode or Samsung Expert RAW are well tuned for each phone’s sensor. Third-party apps mainly help on phones without a good night mode.
Why are my star photos blurry?
The most common causes are camera shake, missed focus and too much noise reduction. Use a tripod and a timer, lock focus on a bright star, and edit RAW files gently.
More from Science & Space
View all →Read next
Withings now charges new users for Apple Health sync
New Withings accounts created from 13 October need Withings+ ($9.95/month or $99.50/year) to auto-sync to Apple Health and Health Connect; older ones stay free.
Resident Evil 2, 3 and 4 remakes hit Switch 2 today — 6 facts
Capcom’s RE2 Deluxe, RE3 and RE4 Gold are out digitally on Nintendo Switch 2 on Oct 16, 2026; physical discs Jan 29, 2027. Plus Monster Hunter Wilds dated for Dec 4.

How much RAM do you need in 2026? 8, 16, 32 or 64 GB explained
What RAM does, how to tell if you're running out, and how much memory to get for browsing, office work, gaming, video editing and local AI in 2026.